Here we'll cover the aspects of C#'s list boxes and checked list boxes (ListBox and CheckedListBox controls).
Using the ListBox
We’ll start with a ‘Windows Application’ project in Microsoft Visual C# .NET. Name it ‘ListBoxes’.
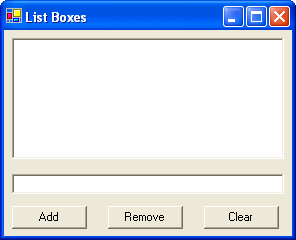
To your newly created form add from the Toolbox a ListBox named ‘itemList’, a TextBox named itemName and three buttons named ‘cmdAdd’, ‘cmdRem’ and ‘cmdClr’.
Your form should now look similar to this one:
All the action is started by the last 3 buttons we have added, of course.
New items can be added to the list by the programmer by selecting the list box and using the ‘Items’ property.
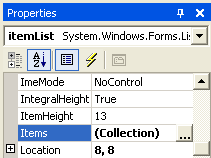
A window pops up, where you can enter new items to be displayed in the list box. Each line represents a new item.
Now arrives the important part: coding. We’ll use the Click event of the ‘cmdAdd’ button to add new items to the list. Of course, the name of the item will be the text in the ‘itemName’ text box.
Double click the ‘cmdAdd’ button to get into the cmdAdd_Click event directly and use the following code:
private void cmdAdd_Click(object sender, System.EventArgs e)
{
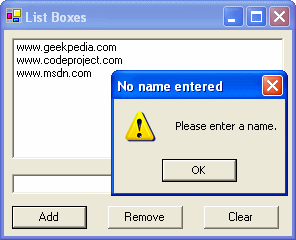
if(itemName.Text == "")
{
MessageBox.Show("Please enter a name.", "No name entered", MessageBoxButtons.OK, MessageBoxIcon.Exclamation);
}
else
{
itemList.Items.Add(itemName.Text);
}
}
As you can see we first test to see if the text box in which the name of the item to be added to the list has any value at all.
If it doesn’t (it is equal to “” – that is nothing) we popup an exclamation MessageBox with an OK button that asks the user to enter a name first.
If it has a value, the item is added to the list by using the ‘Add()’ method of the ‘Items’ collection.
The remove button acts similar.
private void cmdRem_Click(object sender, System.EventArgs e)
{
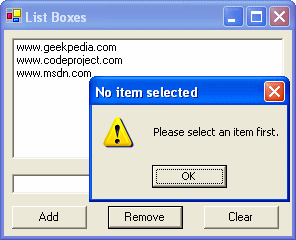
if(itemList.SelectedIndex == -1)
{
MessageBox.Show("Please select an item first.", "No item selected", MessageBoxButtons.OK, MessageBoxIcon.Exclamation);
}
else
{
itemList.Items.RemoveAt(itemList.SelectedIndex);
}
}What does
if(itemList.SelectedIndex == -1)actually do, you ask?
Every item in a list box has an index. The SelectedIndex property shows us which item is currently selected in the list box. If no item is selected the SelectedIndex property is set to -1.
We want to assure that an item is selected before trying to remove it, don’t we?
This is why if no item is selected (SelectedIndex equals -1) we warn the user.
If there is an item selected we can safely remove it using ‘Items.RemoveAt()’ and passing the index of the selected item using ‘itemList.SelectedIndex’ property.
Finaly, we clear the list box using:
private void cmdClr_Click(object sender, System.EventArgs e)
{
    itemList.Items.Clear();
}
As you just saw, handling list boxes isn’t so hard.
Using the CheckedListBox
Similar to its base class, ListBox but allows items to be checked using the checkbox next to each item, this way you can select multiple items.
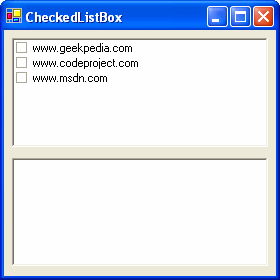
Create a new project named ‘CheckedListBoxes’ and add to it a CheckedListBox and a ListBox. Name them ‘checkedList’ and ‘selectedList’. Now add some items to checkedList (you can add new items just like you do when using a simple ListBox – from Properties choose Items, in the window that pops up every line represents a new item).
After you add some items to ‘checkedList’ your form should look similar to this:
We want every item that is checked in ‘checkedList’ to be added to the ‘selectedList’.
This is easy to code by using the ‘ItemCheck’ event of our CheckedListBox.
With our CheckedListBox (‘checkedList’) selected go to the Events section and scroll until you find the ItemCheck event.
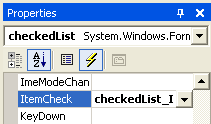
Double click the empty box next to ItemCheck. Microsoft Visual C# will automatically add the ‘checkedList_ItemCheck’ next to ItemCheck and the Event window will now look like in the picture above. Also Visual Studio will bring you to the part where you need to code:
private void checkedList_ItemCheck(object sender, System.Windows.Forms.ItemCheckEventArgs e)
{

}
The ItemCheck event occurs when a value is checked or unchecked in the CheckedListBox. We can use this to add checked items to ‘selectedList’ and remove them from there when they are unchecked.
We can use this code:
private void checkedList_ItemCheck(object sender, System.Windows.Forms.ItemCheckEventArgs e)
{
    if( e.NewValue == CheckState.Checked)
    {
    selectedList.Items.Add(checkedList.SelectedItem.ToString());
    }
    else
    {
    selectedList.Items.Remove(checkedList.SelectedItem.ToString());
    }
}
First we check to see the NewValue of the changed item represented by the ‘e’ argument. If its CheckState is Checked we can add it to the list by using the selectedList.Items.Add() method we learned earlier about.
We also need to convert the SelectedItem using ToString().
Else, if the item was unchecked we remove it in a manner similar to the one we used to add it, just that now we use the Remove() method.
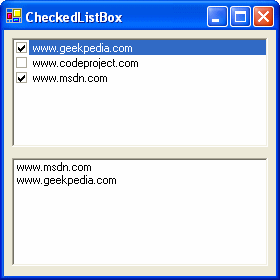
The items are added to the ListBox in the order in which you select them.
If you have any questions comment below or post in the forums.
Stay tunned with Geekpedia.com for more upcoming tutorials. 😉


